
How to Improve Audio Quality for YouTube Videos
Introduction
YouTube has become one of the most popular platforms for sharing information, entertainment, tutorials, reviews, and educational content. Many creators spend hours improving their video quality, editing visuals, and designing thumbnails. However, audio quality is just as important as the visual experience.
Viewers may tolerate an average-quality video if the information is useful, but unclear speech and distracting background noise can make them stop watching. Clear audio helps audiences understand the message, stay focused, and enjoy the content.
Fortunately, improving audio quality does not always require expensive equipment. With a few recording techniques and suitable editing tools, creators can make their videos sound much better.
Why Audio Quality Matters on YouTube
Sound plays a major role in how viewers experience online videos. When a creator speaks clearly, viewers can follow instructions, understand explanations, and remain engaged with the content.
Poor audio can create several problems. Background noise may distract viewers, low volume can make speech difficult to hear, and echo can make a voice sound distant. These issues can be particularly frustrating in tutorials, educational videos, interviews, and product demonstrations.
Creators who pay attention to sound quality can deliver a more professional and comfortable viewing experience.
1. Choose a Quiet Recording Location
The recording environment has a direct effect on the quality of your audio. Traffic, fans, air conditioners, household appliances, and nearby conversations can all appear in a recording.
Before recording, choose a quiet location and turn off unnecessary devices. Close doors and windows when possible, and silence phone notifications to prevent unexpected interruptions.
You can also improve the room’s acoustics by recording near curtains, carpets, or other soft furnishings. These materials help reduce sound reflections and may make your voice sound clearer.
A quiet room is often more useful than expensive equipment in a noisy environment.
2. Use Your Microphone Properly
A microphone helps capture your voice, but its position matters. If it is too far away, your voice may sound weak while surrounding noises become more noticeable.
Keep the microphone at a comfortable distance and speak naturally. Avoid moving it during recording, and consider using a pop filter if strong breathing sounds affect the recording.
If you are using a smartphone or laptop microphone, try to keep the device stable and close enough to capture your voice clearly. Always make a short test recording before filming the complete video.
3. Reduce Background Noise During Editing
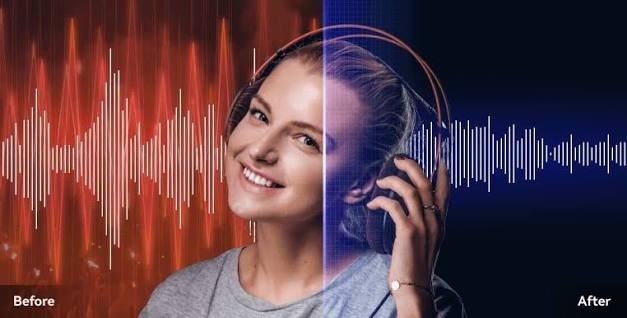
Even when you record carefully, some unwanted sounds may remain. Audio editing can help reduce these distractions and improve speech clarity.
Noise reduction tools are useful for dealing with steady background sounds, such as the hum of a fan or air conditioner. Some online tools also allow beginners to clean up recordings without learning complicated editing software.
For example, Noise Remover is an online option to explore when you want to reduce unwanted background noise in audio recordings.
However, noise reduction should be applied carefully. Excessive processing can make a voice sound robotic or unnatural. Always compare the cleaned recording with the original to ensure that the speech remains clear.
4. Keep Your Voice at a Consistent Volume
Inconsistent volume can make a video difficult to follow. If your voice is too quiet in one section and too loud in another, viewers may need to adjust their device volume repeatedly.
Try to maintain a consistent distance from the microphone while recording. During editing, adjust the volume of quieter sections and reduce excessively loud passages.
Listening with headphones can help you identify sudden changes that might not be obvious through ordinary speakers.
The objective is to create balanced audio that is easy to hear at a comfortable volume.
5. Remove Unnecessary Sounds and Pauses
Raw recordings often contain mistakes, long pauses, repeated sentences, keyboard sounds, and other interruptions. Editing these sections can make your videos more focused and professional.
Listen to the recording carefully and remove distractions that do not contribute to the content. However, avoid cutting every natural pause. Small breaks help viewers process information and make speech sound more natural.
For tutorials and educational videos, clear transitions between sections can also make the information easier to follow.
6. Improve Audio Without Overediting
Audio processing can improve clarity, but too many effects may damage the natural sound of a voice.
Equalization can help balance different frequencies, while compression can reduce differences between louder and quieter speech. These techniques are useful when applied carefully.
Beginners should start with basic adjustments rather than applying many effects at once. Make one change, listen to the result, and decide whether it improves the recording.
A natural voice with minimal distractions is generally more effective than heavily processed audio.
7. Check Audio Before Publishing
Before uploading a video, watch and listen to the complete edited version. Check for background noise, distorted speech, sudden volume changes, and sections that are difficult to understand.
Test the video using headphones and speakers if possible. A recording that sounds good on one device may reveal problems on another.
Pay special attention to the introduction, where poor sound may create a negative first impression, and to sections containing important instructions or explanations.
If you notice a problem, correct it before publishing rather than relying on viewers to overlook it.
8. Develop a Repeatable Recording Workflow
Consistency can save time for creators who upload regularly. Instead of treating every video as a completely new process, develop a simple workflow that you can repeat.
For example, prepare your recording space, check your microphone, record a short sample, capture the main content, edit the audio, reduce unwanted noise, and review the final video.
Keeping similar microphone settings and recording conditions across videos can also help maintain a consistent sound.
A reliable workflow makes it easier to identify problems early and reduces the amount of editing required later.
Common Audio Mistakes to Avoid
Several common mistakes can reduce audio quality even when the video itself looks professional.
- Recording too close to loud fans or noisy computers.
- Increasing the volume of a poor recording without reducing background noise.
- Applying too much noise reduction.
- Ignoring echo and room reflections.
- Skipping the final audio review.
- Recording long videos without testing the microphone first.
Avoiding these mistakes can improve the listening experience without adding unnecessary complexity to your editing process.
Conclusion
High-quality audio is an important part of creating successful YouTube videos. Clear speech helps viewers understand your message, while reduced background noise makes content more comfortable to watch.
By choosing a quiet location, using your microphone correctly, editing carefully, and checking the final recording, you can improve sound quality with relatively simple techniques.
Whether you create tutorials, educational content, reviews, or entertainment videos, consistent attention to audio can help you produce more polished content. Start with the basics, experiment with suitable noise reduction tools, and focus on making every recording clear, natural, and easy to understand.

